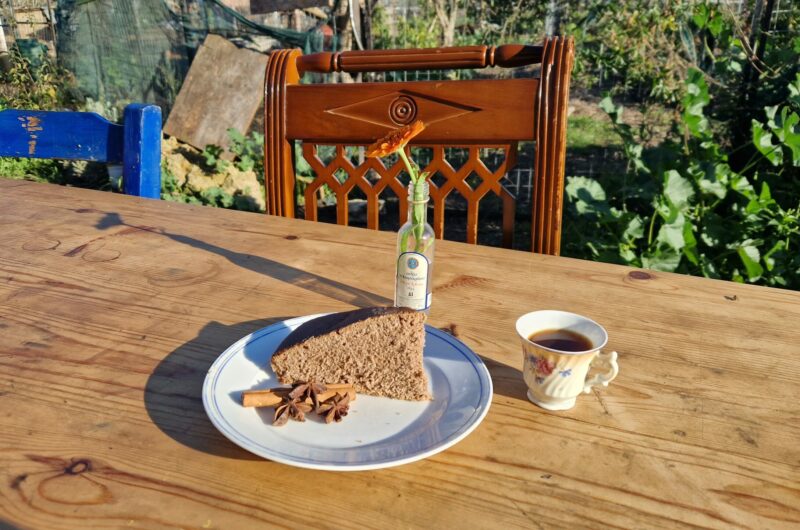
Kalamata table olives

Olives

Kalamata table olives

Named after the city of Kalamata in the southern Peloponnese, Greece, kalamata olives are known for their great taste, almond-like shape, and dark purple skin. But what steps to follow from tree to table?

Ingredients

  • 700 grams red or brown raw Kalamata olives

  • 4,5 liters water (plus more for soaking the olives)

  • 13 tablespoons non-iodized salt

  • 60 ml red wine vinegar or apple cider vinegar

Directions

  • Select the olives and only use the perfect ones, use the bruised ones for something else. Remove any stems or leaves, you could use this as compost. Thoroughly rinse the olives.
  • With a fork or the tip of a sharp knife make a small cutting in every olive. This will speed up the curing process.
  • Place the olives in a food proof container, preferably glass. Add water and make sure all olives are covered.
  • Let the olives soak for 24 hours. Drain the olives and put them back in the container and cover with new, fresh water. Repeat this process for 8 to 10 days. For less bitter olives repeat this process for up to 20 days. During this process you can taste the olives and stop whenever you think the olives have a good taste.
  • When the olives are good to your taste, drain the water.
  • Now make a brine by dissolving 3 tablespoons of the salt in 1 quart of the water. Salty sea water also works. Want to be sure about the right amount of salt? You could do use the following trick: put a fresh egg in the water, it starts floating and just surfacing? This is when you found the right amount of salt. Pour the brine over the olives and leave for one week.
  • Repeat the rinsing and brining process 3 more times, which will result in four weeks of brining in salted water.
  • After four weeks you can taste the olives. If it is bitter, continue with the brining process for another week and taste again. Continue until the olives are no longer bitter.
  • Drain the olives and transfer them to clean (sterilized) glass jars.
  • Make a brine with 1,5 tablespoons salt and 570 ml water. Add 60 ml red wine vinegar or apple cider vinegar. Add the brine to the olives in the jars.
  • Close the jars and store them in them in a cool and dark place, the refrigerator is also fine. Wait at least a week or to. You can store them for up to year.

Notes

    Andi’s green tomato jam

    IMG

    Andi’s green tomato jam

    Servings

    40

    150ml jars

    You don’t need to worry about the solanine (toxic substance) inside unripe tomatoes because the sugar in the jam reduces the amount of solanine.

    Ingredients

    • 6kg green tomatoes

    • 3,2kg sugar

    • Thyme branches

    • Lemon and mint

    • 2 tablespoons cinnamon

    • 2 tablespoons cardamon

    • Orange peel

    Directions

    • Sterilize the jars in boiling water
    • Wash and cut the tomatoes
    • Cook all ingredients in a big pot
    • Add the contents to the jar and seal

    Notes

    • For a thicker consistency you could add lemon juice or pektine. The unripe tomatoes already contain a lot of pektine.

    Andi’s green tomato chutney

    IMG

    Andi’s green tomato chutney

    Servings

    25

    150ml jars

    You don’t need to worry about the solanine (toxic substance) inside unripe tomatoes because the sugar in the chutney reduces the amount of solanine.

    Ingredients

    • 3,5kg green tomatoes (take the dropped ones!)

    • 4 big onions (dropped ones work as well – they don’t need to be perfectly beautiful)

    • 750g sugar

    • 200g raisins

    • 2 large apples

    • 720ml vinegar

    • 50g ginger

    • 2 tablespoons cinnamon

    • 2 tablespoons curry

    • 120ml sweet chili sauce or chili powder

    • 30 pcs cloves

    • 3 teaspoon salt

    • 3 teaspoon pepper

    • 3 large garlic cloves

    Directions

    • Sterilize all jar in boiled water.
    • Mix everything together and cook for 45 minutes.
    • Add to the jar and seal.

    Josh’s chili sauce

    IMG

    Josh’s chili sauce

    We advise you to wear gloves during the whole cooking.

    Ingredients

    • 300/400g chilis

    • 150g sugar

    • 150ml vinegar

    • Garlic

    • Ginger

    • 2/3 tablespoon flour

    Directions

    • Mix the chilis, sugar, vinegar, garlic and ginger in a big pot.
    • When its starts cooking add a mix of the flour + water.
    • Wait until the sauce gets less liquid.
    • Try the sauce.
      If it’s too hot: add paprika, tomatoes, oranges or mango 🙂

    Andi’s sourdough bread

    IMG

    Andi’s sourdough bread

    Course: Recipes
    Servings

    1.5

    kg dough

    Ingredients

    • 885g wheat flour

    • 570g water (with some yeast water if you don’t use sourdough starter)

    • 30g active sourdough starter

    • 20g salt

    Directions

    • 24h before baking:
      Mix everything.
      Knead it 2 times : 1st after 2 hours and 2nd around 12 hours before baking
    • Bake it at 230-250°c
      Take it out when the color and the consistency is good. To check: dip a knife and verify that it is not wet.

    Notes

    • Do not add more flour too late. The consistency of the dough has to be as you want it after you finish mixing the ingredients!
    • If you are using sourdough for your bread the norm is to put 20% of the flour’s weight. Use the sourdough when it is fermented, feed it after.

    Crispy kale in the oven

    Crispy kale in the oven

    Crispy kale in the oven

    This recipe is so easy and oh so delicious!

    Ingredients

    • Fresh kale leaves (could be the curly or flat type)

    • Olive oil

    • Salt

    Directions

    • Clean and dry the leaves well with a kitchen cloth. 
    • Spread them evenly on an baking sheet so each piece of kale leaf can lie flat in a single layer. 
    • Sprinkle with olive oil, be light handed as the kale will shrink! 
    • Bake low and slow for 20 minutes. This might be the only tricky part. You want to monitor them to get the best result. It can take a bit of practice depending on your oven to get the most perfect result! They should stay green (brown is too late!) and be tender in the center. We sometimes turn off the oven after 20 min and leave them in for an extra 10 minutes. If they are not fully crispy don’t worry, they will be after a few minutes out of the oven!

    Dio Pigadia’s kombucha

    Kombucha Recipe

    Dio Pigadia’s kombucha

    Born in China over 2000 years ago and brought to the western world in the 18th century, kombucha is a “miracle drink” that enhances your health, beauty and brainpower. With kombucha’s low sugar content, when it undergoes a process of prolonged fermentation, it produces organic acids like glucuronic acid & gluconic acid.

    Note: multiply the recipe depending on the amount of water your jars can hold

    Ingredients

    • 1/3 cup granulated sugar

    • 4g of black/green tea (not perfumed) or 2 tablespoons loose tea leaves

    • At least 1 cup of kombucha from previous batch (neutral mix)

    • SCOBY (symbiotic culture of bacterias and yeast)

    Directions

    • FOR THE FIRST FERMENTATION
    • Infuse the tea with hot water for 15 minutes.
    • Remove the tea and add the sugar in the warm water, stir to dissolve it.
    • Add the kombucha from the previous batch, the SCOBY and fill up with filtered water.
    • Cover with a clean dish towel and secure with a rubber band or a length of string.
    • Set the jar or jars somewhere dark and cool, and allow to ferment 8 to 14 days, tasting occasionally after 1 week. Aim for a light fermentation and a slightly vinegary taste.
    • FOR THE SECOND FERMENTATION
    • Remove the SCOBY and around 3 cups of kombucha (I often keep the bottom liquid to have the more sediments of the SCOBY). 
    • Add any flavor to your different bottles: pineapple, raspberry, tamarindo, jamaica tea, lemon, ginger, rosemary, thyme, honey or any other tea or herbs. The new flavors should represent 10% of the total quantity of kombucha. If the flavors you are adding do not contain natural sugars (honey or fruit juice) it is best to add some sugar (unless it is still very sweet) to help add some carbonation. Pour it through a funnel into air tight bottles. Try to leave only a little air in the top to help aid carbonation.
    • Let sit somewhere dark and cool for 3 to 7 days, checking after 3 to taste how bubbly the kombucha has become, then place in the refrigerator until ready to drink, to stall the fermentation. Serve cold.

    Notes

    • If the green or black tea leaves have some perfume, it contains an oil that kills the good bacterias of the SCOBY. Make sure to use normal black or green tea. Black tea is more efficient.
    • Always use really clean bottles, container and tools. Use glass container and not plastic. Use filtered water or let sit few minutes the tap water before mixing it. Again, bad bacterias can infiltrate and good bacterias be killed.
    • The time of fermentation is approximate, taste often since the 5th day to see if the acidity of the fermentation suits you (and to see if it is effective). It should be a lighter orange when it is ready.
    • The SCOBY will be moldy if it’s sick; it will be like mold on a bread (blue, white, little dots), then you need to throw everything out.
    • There is 2 fermentations for having a nice fizzy kombucha but also, you need bottles with anti-pressure caps. They will seal and then provide bubbles, but if you use another kind of hermetic lid, it can overload the pressure and explode.
    • The larger the SCOBY, the faster the fermentation will be, and so filled with probiotics and the taste will be acidic. The more the kombucha jars are in a hot and sunny place, the faster the fermentation also will be. It is not more or less convenient, it depends on your needs.

    Julie’s cinnamon rolls

    Cinnamon Rolls Recipe

    Julie’s cinnamon rolls

    Servings

    8

    servings
    Prep time

    15

    minutes
    Cooking time

    15

    minutes
    Total time

    30

    minutes

    Tired of that same old boring breakfast routine? It’s time for a change! Spice up your morning routine with some cinnamon rolls! With this delicious recipe, you’ll learn how you can wow your friends and family (even the pickiest of eaters!) with your baking skills. That is, as soon as they’ve had their fill of our mouth-watering cinnamon rolls!

    Ingredients

    • 110 g brown sugar

    • 60 g butter 

    • 400 g flour

    • 200 ml milk (or water will do!)

    • Salt

    • Yeast

    • Cinnamon

    Directions

    • For the dough
    • In a bowl mix warm milk, brown sugar and a package of yeast. Wait until it makes “mousse” (bubbles)
    • Add flour, a pinch of salt, the melted butter and mix until you have a good elastic consistency
    • Let rise for 1h30 with warm wet towel on top. 
    • Making the roll
    • Spread the dough in a rectangle 40/50cm
    • Spread some butter on the dough
    • Mix 60g of brown sugar with a tablespoon of cinnamon powder
    • Spread the mix on the buttered dough evenly
    • Roll tight the dow and cut it in pieces
    • Put in a buttered baking tray in a hot oven and cook 15min at 180 deg C.

    Notes

    • Enjoy!

    Saskia’s handmade gnocchi

    handmade gnocchi

    Saskia’s handmade gnocchi

    Servings

    6

    servings
    Prep time

    30

    minutes
    Cooking time

    40

    minutes
    Total time

    1

    hour 

    10

    minutes

    Gnocchi is one of the most delicious homemade pasta recipes to try. Using shredded, boiled potatoes and combining them with some all-purpose flour, egg and salt, you can create a tasty Italian dish that is protein-rich! Place them in boiling water with some salt and cook until they rise to the top – then enjoy this simple yet amazing savory dish!

    Ingredients

    • For the gnocchi
    • 1 kg of potatoes

    • 300 grams of all-purpose flour

    • salt to taste

    • For the sauce
    • 150 grams butter

    • Sage or other fresh herbs

    • Garlic

    • Lemon zest

    Directions

    • Boil the potatoes until they are soft, shred them with a grater, then squeeze the excess water out and wait until they are cool.
    • Mix the potatoes with the other ingredients, make a dough and let it rest for at least 2 hours covered with a cloth.
    • Make some long and thin “snakes” with the dough and cut into small pieces. 
    • Boil a pot of water, add the gnocchi handful by handful, making sure they don’t stick together.
    • When they come to the surface take them out.
    • Butter sauce
    • Place a smaller pot in the boiling water.
    • Melt some butter.
    • Add fresh herbs and garlic. Lemon zest works great also, let your imagination free!

    Recipe Video

    Notes

    Alban’s olive oil soap

    showcase the natural olive oil soap
    natural olive oil making
    Natural olive oil soap making at Dio Pigadia

    Create your own healthy soap with this easy-to-follow recipe. Olive oil is antibacterial, which helps prevent unwanted fungus growth in the kitchen and bath. Plus, it’s a moisturizer that’s fantastic for dry skin. Its antimicrobial property also makes it a great soap bar for sensitive skin prone to developing rashes and allergic reactions.

    Alban’s olive oil soap

    Prep time

    10

    minutes
    Cooking time

    20

    minutes
    Total time

    30

    minutes

    We know how difficult it is to cope with cold and dry winters, which often dries out our skin. That is why we want to share with you a most effective way of how to moisturize it – with homemade soap from olive oil.

    🚨 this is chemistry – make sure to use personal protection equipment!

    Ingredients

    • 1,93 liters olive oil

    • 410 grams caustic soda/lye powder

    • 965cl distilled water

    • Protection equipment
    • Glasses

    • Gloves

    • Mask

    • Other
    • 1 glass bowl

    • 1 mixer

    Directions

    • Pour the water in a glass bowl. Add the lye little by little.
    • Mix well. Let cool down to around 30 degrees C.
    • Add the olive oil slowly and mix it well.
    • Put in a mold. Let cure for about 5 weeks before using.

    Notes

    • Tip: You can flavor the olive oil with lavender, rosemary, dry orange peel or about anything but it must be dry and rested in the olive oil for some time.